Tuesday, June 17, 2014

Fast, Fun, Better Writing

WRITING TIP

This week's writing tip combines relaxation and work. No, now that I think about it, it is all work.

What is the best thing any of us can do to improve our writing?

The answer is right here in this picture.

A week ago, chilly enough for a fire -- in June.

Drink tea?

No. The best way to improve writing is to read. Read the type of material you want to write, but read everything else, too. While you are reading, keep your analytic mind engaged. Be aware of the mechanical details -- not just of the words -- everything.

I was reminded of this when Gentleman Friend received a free copy of Western Horseman magazine.


 A horse has never been a part of my life; however, as I flipped through the magazine, I soon was engrossed in reading.

The articles are constructed like articles in most magazines, but because I know nothing about the subject, the structure of the article became apparent. Opening paragraph, reporting, background, flashback, vocabulary, quotes, setting, conclusion that tied back to the opening. It was all there, but it was easier to see.

Read. Learn. Write.

There you go. That's all there is to it.

Oh, and maybe think a little, but that is harder work -- for another day.

LAUNCHING PAD

Go to the library. (This is fun already.) Find two magazines about subjects that are of absolutely no interest to you. Photocopy a story from each magazine.

(Here comes another fun part.) Get out your colored markers (If you don't have colored markers, buy some.) (More fun -- a trip to the office supply store.)

Now mark the opening paragraph. Where does it begin? Where does the writer let you know what the story is about? Mark that. Look at the quotes? What purpose do they serve? Where does the writer give background information -- flashback? Mark those places too. Unsure how to use quotation marks? Look at how they are done in the story. Where is setting described?

If you are writing a book -- novel, memoir, history, how-to, for example -- buy some used books that you can mark up. Look at the contents. Look at the overall organization.

Note the techniques you think would work for you -- as well as those you would not want to use.

You get the idea. Read. Learn. Write.

CHOCOLATE INKWELL 

Chocolate Cherry Bomb Cookies
photo and recipe from www.hungryhappenings.com


Ingredients: 

1 Pillsbury Devil's Food Cake Mix 
1 1/4 cups water 
1/2 cup vegetable oil
 3 eggs 1/4 cup - 
1 tub Pillsbury Classic White Frosting*
30-48 Maraschino Cherries with stems* 
16-22 oz. tempered semi-sweet chocolate (or   dark confectionery coating/candy melts)

Preheat oven to 350 degrees. Prepare cake pan/s by spraying with no-stick cooking spray. Blend cake mix, water, oil, and eggs in a large mixing bowl until moistened.  Using a hand held mixer , beat on medium speed for two minutes. Pour batter into prepared pan/s.  Bake for 29-35 minutes (see package for specific times for each pan size). Cool cake completely.


Crumble cooled cake into a large mixing bowl.  Add 1/4 cup frosting and mix until well combined. Add more if needed. Scoop mixture out by the tablespoonful.    Roll each scoop into a ball.
-

Drain maraschino cherries and pat dry with paper towels.  Press one cherry into the center of each cake ball.  Bring the cake mixture up and around the cherry.  Roll in between your two hands to form a nice ball. -


Melt and temper semi-sweet chocolate or melt confectionery coating/candy melts. Dip cake covered cherries in chocolate.  Set on a parchment paper lined baking sheet. Refrigerate if using tempered semi-sweet chocolate until set, about 10 minutes.  If using dark candy melts, place your cherry bombs in the freezer until set, about 5 minutes.  Bring to room temperature before serving. –


Note: I do not know why the appearance of the recipe paragraphs is inconsistent. So sorry. But if you are truly dedicated to chocolate, you will be able to rise above my shortcomings. Enjoy!
To learn more about how to use reading to improve your writing and to see short examples, refer to the following pages in your  Write Your Life Story in Eight Weeks Workbook: pp. 7, 11, 14, 15, 16, 19, 20, 23.

All rights reserved 2014 There's An Angel In Your Inkwell®

Monday, June 9, 2014

Lesson Learned on a Layover

WRITING TIP

I had a couple of hours to wait for my connecting flight. So did everyone else. The airport gate waiting area was full. Beside me sat a woman dressed in chic California casual attire. Her dark hair was cut in a stylish bob and she wore designer eyeglasses.

I eyed her Italian leather sandals. Probably her biggest worry is her next pedicure appointment. It was obvious we had nothing in common.
Photo courtesy of Google
(So sorry the complete photo credits flew by before I captured them)

As the minutes dragged by, she began to talk to me. About both her mother and her mother-in-law coming to live with her and her son having a serious illness. Both the mother and mother-in-law had recently passed away and her son was well again. But earlier, her life had become so stressful to the woman that she had sought the help of a therapist.

Near the end of her therapy, the therapist had asked, "What is the gift in this situation?"

The woman said she had not known whether to find the question amusing or infuriating.

But then she thought about it. She was moving to a new city and starting a business. She felt stronger and more capable than she had ever felt before. Now she knew that when tough times came, she could dig deep and find the strength to do what she needed to do.

Well, folks, that set me back in my chair. Suddenly, I had great respect and admiration for her. This woman had a story and she was not afraid to tell it -- complete with all her fears, angst, tears, and anger.

How about you? Are you telling the real story? Are you letting your family and friends and other readers inside the real story?

What hard times have you survived?

And what was the gift from going through those times?

That's just another way of saying, how were you changed; what did you learn; what good came from the hardship?

And when you answer those questions, then you have told a story. And your reader will love you all the more for it.

LAUNCHING PAD

Look back at a chapter or story in your memoir or life story. Was there a gift to that particular event or experience?

Did you have any insecurity?

Have you written about the insecurity? Have you written about the real problem? Did you overcome it? How were you changed?

Not every page or every chapter will have some big traumatic experience, but look at your book as a whole as well as look at the individual chapters and show the reader who you were then and who you are now.

You may need only a couple of sentences or a few words to express all that. We aren't asking you to sling mud at yourself and then wallow in it. Just give us a peek into your heart.

CHOCOLATE INKWELL 

Aren't these cute? The recipe and photo step-by-step are from Corcoran Street Kitchen. Probably best to make the "tea cups" ahead because it won't work to rush while assembling these.


Photo courtesy of Corcoran Street Kitchen


Edible Teacups for Fun

12 sugar ice cream cones (plus extras in case some break)
12 peanut butter cups
1/2 cup melting chocolate (The recipe says "like Wiltons." Would melted chocolate chips work?)
12 white Oreos (or other cookies)
6 tiny twist pretzels (plus extra in case some break)
chocolate or vanilla pudding or yogurt (to fill the cups)
12 small plastic spoons

1. Use a serrated knife to cut off the bottoms of the ice cream cones. (Slowly, gently, deliberately.)
2. Make the handle: use serrated knife to cut off tops of pretzels
3. Melt the chocolate
4. Line up the cookies
5. Dot each cookie with some chocolate and place a peanut butter cup upside down on top
6. Dip the bottom of the cone into the chocolate and set it on top of the peanut butter cup
7. Hold the cone for a few seconds to harden in place
8. Check and repair any holes in your "teacups"
9. Attach the handles by dotting chocolate on both ends of the pretzel and holding it onto the side of the cone until it is set. 
10. Fill with chocolate when ready to serve. 

(Note: To see step-by-step photos, go to Edible Teacups.)


If you are struggling with how to write about difficult events, look at your Write Your Life Story in Eight Weeks Workbook. The following pages will help you: pp 15, 17, 24, 25, 26, 27. 

Remember, this workbook was written for those who are ready to start writing today, for people who want to write, not read a whole book about it first.


If you don't have the workbook, order your copy today at  Buy the Workbook.


All rights reserved 2014 There's An Angel In Your Inkwell®

Monday, June 2, 2014

Mapping Out Your Summer Plan

WRITING TIP

Summer energizes me to come out of winter hibernation and take on a project. Maybe it can do the same for you and your writing project.
All set for a summer project

You may be asking yourself: Is it too late? Can I do it? 

Here are the answers: No. Yes. No, it is not too late. Yes, you can do it. And, I have the proof.

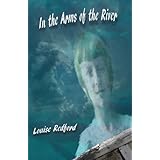
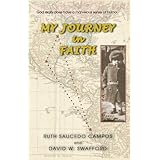
Here are memoirs by two women who were members of my life story writing group. I am taking no credit for the completion of their books -- just making the point that these are women I know, women you could know or be.

Both women were in their eighties when they finished and self published their books. The books might eventually reach a wide readership, but they were written to inform and inspire family and friends.

Both are available as print copies but are more easily available as e-books.

The authors had help with the production including cover design, interior design, printing, and e-publication. But they didn't let the prospect of production daunt them. They did the work. They did the writing. Each woman told her story.

And I can tell you that Saturday I saw dramatic evidence of what a comfort and blessing a written life story can be to family and friends.

Saturday, May 31, 2014, the memorial service for Louise Redford, author of one of the two memoirs I am telling you about, was held. Portions of the book were read by several of her adult children who talked about their mother and how the book revealed deeper aspects of her true character of love, service, and quest for peace than even they had fully realized. And how they felt inspired in their own lives.


In the Arms of the River


This is a dramatic memoir of growing up as a Mennonite under Soviet oppression in the 1930s, of escaping to Germany during World War II, and ultimately finding refuge in Canada and the US. Louise Redford (nee' Unger) was born in 1928 in the Mennonite colony of Einlage, near Zaporozhye, Ukraine. Her people were among the first to farm its rich soils when they settled there in the 18th century, but German pacifists had no place in the Soviet Union. Her own father was arrested and sent to work in Siberia, and never returned. Her community was destroyed by the Purge and the War, and few now remember it. Yet what she recalls today is not the fear and chaos, but her close-knit family and friends, and the beautiful Dniepr River, their playground and their haven. It's a story of bright memories in the midst of dark chapters of modern history.


My Journey in Faith


Ruth Saucedo Campos is a retired, award-winning school teacher from Kansas City, Kansas. As one of three U.S.-born daughters of Mexican immigrants, she endured the Jim Crow era during the 1930s and 1940s and struggled to find her way in a greater society that did not care. Only after accepting her father’s advice ("Put the Church first always!") did she begin her journey toward self-discovery—and recognize her mystical connection to God. Traveling to Lima, Peru as a Papal volunteer in 1960, she discovered her true place—in the classroom. As a missionary, she gave aid to the poorest of the poor and fell in love with teaching. Through the years she would travel to Mexico and Spain as well, growing to deeply appreciate her Hispanic roots and people of all cultures. Once back home, Ruth finished her education and accepted a job as a high school Spanish teacher in her childhood barrio. She taught for many years, earning numerous accolades for the exceptional ways she gave of herself. Outside the classroom she gave time and energy to local charities and independently led cultural exchange groups to Mexico. Upon her retirement from Sumner Academy, she was not quite finished teaching. She spent the next ten years doing the same as she had done when she first began—by teaching catechism classes in her local parish. In this remarkable and inspiring memoir, Ruth's undying faith and spirit come shining through for all to appreciate.

LAUNCHING PAD

This week study the blurbs above that describe each book. Rewrite one or both of the blurbs inserting your own information.

For example, I might copy the description of Louise Redford's book and write: This is a dramatic memoir of growing up in southwest Oklahoma in the 1940s and 1950s and finding refuge in the loving compassion of a Southern Baptist church. Carol Newman (nee' Allison) was born in 1942. Her people were among the first to receive Land Grants when Indian Territory became the state of Oklahoma. 

You get the idea. You could do the same thing with the description of Ruth Campos' book.

It is not cheating or copying or plagiarism. It is a way to get started thinking about the shape and form of the story you want to write. It is practice which may be discarded or may even find its way to the back of the book you write.


CHOCOLATE INKWELL Today's recipe is from www.allrecipes.com, but it is a variation of a recipe I first heard about from my friend, Terri-Lynn, who frequently entertains her friends and family with her excellent cooking.

Strawberry Cheesecake Bites Recipe
Photo courtesy of www.allrecipes.com
In this case the words are better than this picture

Chocolate Strawberry Cheesecake Bites 

Directions (Note: read through the directions first and then figure out your own simpler method.)
  1. Line a baking sheet with waxed paper.
  2. Beat together the cream cheese, confectioners' sugar, and vanilla extract in a bowl until smooth.
  3. Spoon the mixture into a piping bag fitted with a large round tip. (OR use a plastic sandwich bag with the top of one corner cut off.)
  4. With a sharp paring knife, cut a cone shape out of the top of each strawberry to leave a small hollow. (OR simply cut an X in the top of the strawberry and smoosh your piping point into it.)
  5. Pipe about 1 tablespoon of the cream cheese filling into each strawberry, making sure that the filling overflows a bit out of the top of the strawberry.
  6. Place the graham cracker crumbs into a shallow bowl. Dip the filled side of the strawberry into the graham cracker crumbs, coating the exposed filling with crumbs.
  7. Melt the chocolate and canola oil in a microwave-safe glass or ceramic bowl in 30-second intervals, stirring after each interval, until warm and smooth, 1 to 3 minutes (depending on your microwave).
  8. Dip the unfilled ends of the strawberries into the melted chocolate and place on the prepared baking sheet; refrigerate until set.


For more memoir writing tips and answers to your memoir and life story writing questions, go to www.angelinyourinkwell.com 


All rights reserved 2014 There's An Angel In Your Inkwell®

Monday, April 21, 2014

Get to First Base with Your Writing

STYLE TIP

Today's post is a Style Tip I wrote several years ago for the Heart of America Christian Writers Network newsletter.

Remember that old baseball comedy routine, “Who’s On First?” The confusion centered on a player named Who. 

“Who’s on first?” the comedian asks. “Who,” answers the second actor. From there the conversation circled endlessly.

Maybe you get the same feeling when you try to decide whether to use which or that.

According to The Chicago Manual of Style, this is the rule: use which to set off nonrestrictive clauses; use that to introduce restrictive clauses.

Oh yeah, now you get it – if only you knew what a nonrestrictive clause is.

Fortunately, the big orange book of style goes on to explain that a restrictive clause is one that is necessary to the sentence; therefore, a nonrestrictive clause would be . . . You get the idea.

Still puzzled? Here are some CMS examples to illustrate the point more succinctly:


Pizza that’s less than an inch deep just isn’t Chicago style.

Pizza, which is a favorite among Chicagoans, can be either bad for you or good, depending on how much of it you eat.

Note that if you remove “that’s less than an inch deep” from the first sentence, it becomes inaccurate; i.e., it’s not true that “pizza just isn’t Chicago style.” The clause, then, is restrictive (necessary) to the sentence; therefore “that” is correct.

If, however, you take out the clause “which is a favorite among Chicagoans” from the second sentence, it still makes sense: i.e., pizza can be either bad for you or good, and whether or not it is a favorite among Chicagoans does not “restrict” this meaning; therefore the clause is nonrestrictive and should be introduced by “which” and set off by commas.

Or to put it another way – that which does not kill you, makes you a better writer.

Source: The chicago manual of style  - 15th edition


All rights reserved 2014 There's An Angel In Your Inkwell®

Tuesday, April 15, 2014

Take A Look

WRITING TIP

In the future, we may return to this topic but for now, here is the last tip about writing about difficult life experiences. This is a short one. 

Reflection. Write a sentence or paragraph about the event. Immediately, or later, read back over what you have written. Then write what I will call a "reflection." 


The reflection is just for you. It is not a part of your life story or memoir that will be published or shown to family. (Unless, of course, you decide to do so.)

Continue writing about the life event(s) and writing reflections until you feel comfortable and able to write daily. 

You might answer these questions:

How did the writing make you feel? 
What do you observe about the event?
What thread of continuity do you find between this event and previous events?
What did you learn from writing about the event?

This is a part of the therapeutic aspect of writing. Various studies have shown that writing is therapeutic, but some  found that the most benefit came from reflecting back on what had been written and writing about that, too. 

From time to time, review your reflective writing and see if it leads you to deeper writing or new insights.

If you do this, I think you will find yourself feeling stronger, braver, and more able to continue with the writing of your memoir or life.

If you have a desire to write about your life, it is too important to allow yourself to be distracted. 

LAUNCHING PAD

Return to a piece of writing. Read it. Write a reflection, using the questions above as a guide.

Chocolate Inkwell

Thank you to Vickie for sending me this recipe. When I saw the name, Peanut Butter Cups, I thought it was for something like a copy of candy peanut butter cups. Wow! Was I wrong.

Part of the reason I like this recipe is that it gives you an excuse to use cute little ramekins, and if you don't have any, which I don't, it is an excuse to go out and buy some. (Hello Marshall's.)

The source for the recipe is/www.bestyummyrecipes.com. It calls for specific brands, but, of course, I doubt they are necessary. Note, though, that the ingredient list does not include the ingredients on the cake mix -- which you will need.

Peanut Butter Cups


Peanut Butter Cups
Photo Courtesy of yummyrecipes.com
  • 8 (4 ounce) ramekins
  • 1 (15.25 ounce) Betty Crocker Devil's Food cake mix (and ingredients called for on the package)
  • 1 cup creamy peanut butter
  • 1 1/2 cups powdered sugar
  • 1 cup dark or semi-sweet chocolate chips
  1. Preheat oven to 350 degrees and spray ramekins with cooking spray.
  2. Prepare cake mix batter according to package directions.
  3. In a medium bowl, mix the peanut butter and powdered sugar with a hand mixer or by hand until completely combined. Form 8 golf ball sized balls and set aside.
  4. Scoop 3-4 tablespoons of cake batter into each ramekin. Place peanut butter ball in the center of the cake batter in each ramekin. Cover the peanut butter ball with 1-2 tablespoons of cake batter.
  5. Bake peanut butter cups for 16-19 minutes or until top is set and bounces back.
  6. Top each cake with 1 Tablespoon of chocolate chips and let melt. You can spread them once they melt or just leave them as is.


Check out http://www.angelinyourinkwell.com/index.php for life story writing questions and answers. 
And, while you're there, if you like cute greeting cards, click on Buy Here.


Mirror photo by Carol Newman
All rights reserved 2014 There's An Angel In Your Inkwell®